
Showing posts with label artsy addicts. Show all posts
Showing posts with label artsy addicts. Show all posts
Monday, August 29, 2011


Monday, May 23, 2011
YouTube Layout Hop
Hi everyone!
Welcome to my first YouTube Layout Hop!!!
Here is my layout:

love and hugs,

Welcome to my first YouTube Layout Hop!!!
Here is my layout:

Here is the video. There is info below the vid on YouTube for the next stop and the rest of the participants and a note about the sponsors!
love and hugs,

Friday, April 29, 2011
Arty Addicts Technique Blog Hop
Hi everyone!!! Happy Friday!!!!!!!!
Welcome to the Artsy Addicts Technique Blog Hop!
You should have come here from M-C Graves. The next stop is Flora Garcia-Alvarez.
My technique is a couple of things combined as a starting point for various projects...... I will show you how I attach paper to chipboard and then make it vintage... See this post for an example of finished projects using this technique.
I started out with a piece of chipboard (mine happened to be a 4" by 4" piece as I was making more magnets!!)




Welcome to the Artsy Addicts Technique Blog Hop!
You should have come here from M-C Graves. The next stop is Flora Garcia-Alvarez.
My technique is a couple of things combined as a starting point for various projects...... I will show you how I attach paper to chipboard and then make it vintage... See this post for an example of finished projects using this technique.
I started out with a piece of chipboard (mine happened to be a 4" by 4" piece as I was making more magnets!!)


I used glue to adhere the paper to the chipboard and evened everything out using a brayer. When gluing the paper down, I used 2 edges - less to trim later! Also, don't worry about glue on the front of the DP. It will act as a resist when distressing and add to the vintage look. (You'll see what I mean...)

Trim time! (See what I mean about less to trim?) :)

I sanded the sides and corners. I like to round out the corners a bit. Why? I have no idea. I just like the look :) The DP turns a little white at the sanded edges and this is perfect for the vintage look.

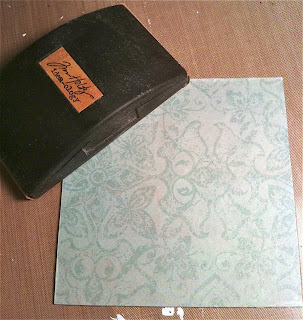
Above is my 'recipe' for the vintage look... First I used Tea Dye on the sides and corners and lightly on the inside. Then I used Vintage Photo on the corners and edges. Finally, I used a light hand of Black Soot on the corners.
Finished look below. See how the dried glue acts as a resist for the inks? So fun!

See this post for finished projects using this and other techniques. You can also make journal covers, book covers, mini album covers, wall hangings, etc using this technique.
Now on to Flora Garcia-Alvarez!!!
Enjoy!
Subscribe to:
Posts (Atom)